Docker Compose: #Day18 of 90DaysofDevOps


Docker Compose👩🏻💻
Docker Compose is a tool for defining and running multi-container Docker applications.
With Docker Compose, you can specify all the services your application needs, their configurations, network connections, and dependencies.
This file, typically named docker-compose.yml, provides a clear and consistent way to launch and manage your entire application stack with a single command.
The main use of Docker Compose is to simplify the process of orchestrating and deploying multi-container applications.
It's particularly helpful for development environments, testing, and local setups, as it streamlines the setup of multiple containers that need to work together.
By defining the configuration in a YAML file, you can easily recreate consistent environments across different systems and share them with your team.
What is YAML?
YAML is a human-readable data serialization language that is often used for writing configuration files.
YAML is commonly used for configuration files in various software applications, including Docker Compose, Kubernetes, Ansible, and more.
Task-1
Learn how to use the docker-compose.yml file, to set up the environment, configure the services and links between different containers, and also to use environment variables in the docker-compose.yml file.
- Install docker-compose on Amazon Linux:
sudo curl -L "[github.com/docker/compose/releases/latest/d..](github.com/docker/compose/releases/latest/d.. -s)-$(uname -m)" -o /usr/local/bin/docker-compose
sudo chmod +x /usr/local/bin/docker-compose

Create a docker-compose.yaml file in project directory:
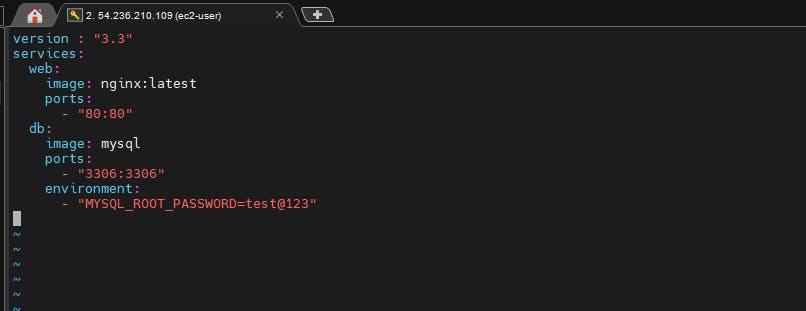
verify the docker-compose.yaml file

run the command
docker-compose up -d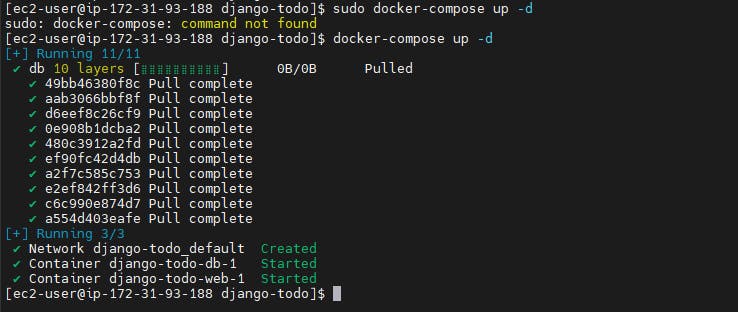
Checking the status of created servers:
docker-compose ps -a
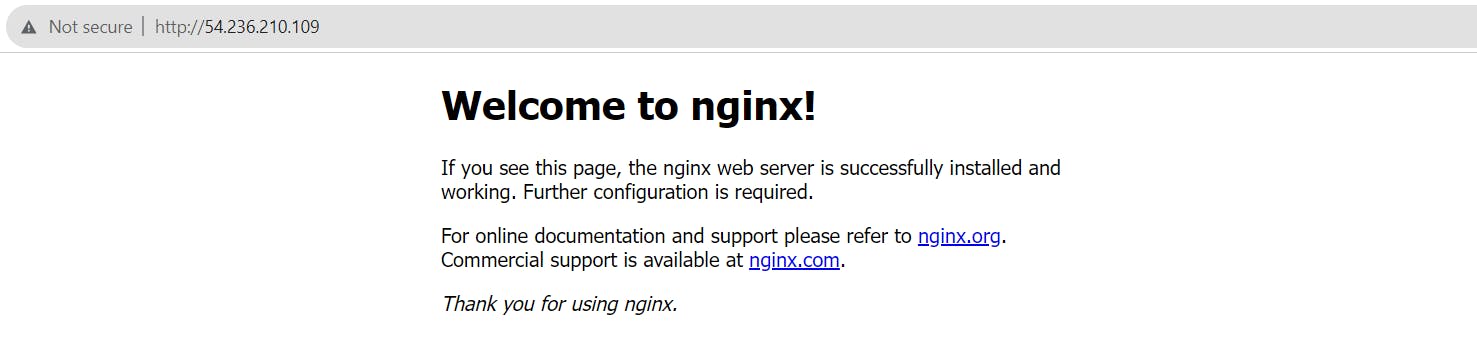
Through docker-compose file nginx has crested and it's up and running fine
Task-2
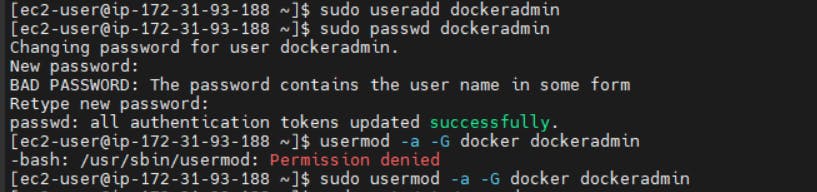
- Pull a pre-existing Docker image from a public repository (e.g. Docker Hub) and run it on your local machine. Run the container as a non-root user (Hint- Use
usermodcommand to give user permission to docker). Make sure you reboot instance after giving permission to user.
-To pull pre-existing docker image, you first need to login to your docker hub registry

-Pulling a custom image from docker hub using command:
docker pull repository_name/image_name:tag
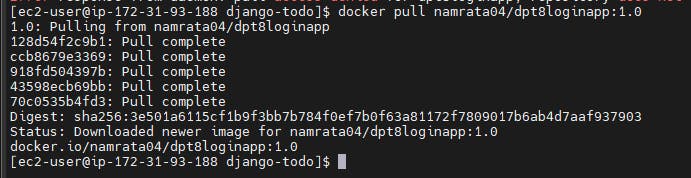
-Verify pulled image is showing in your local repo: docker images

-Created container from the image


-Inspect the container's running processes and exposed ports using the docker inspect command.

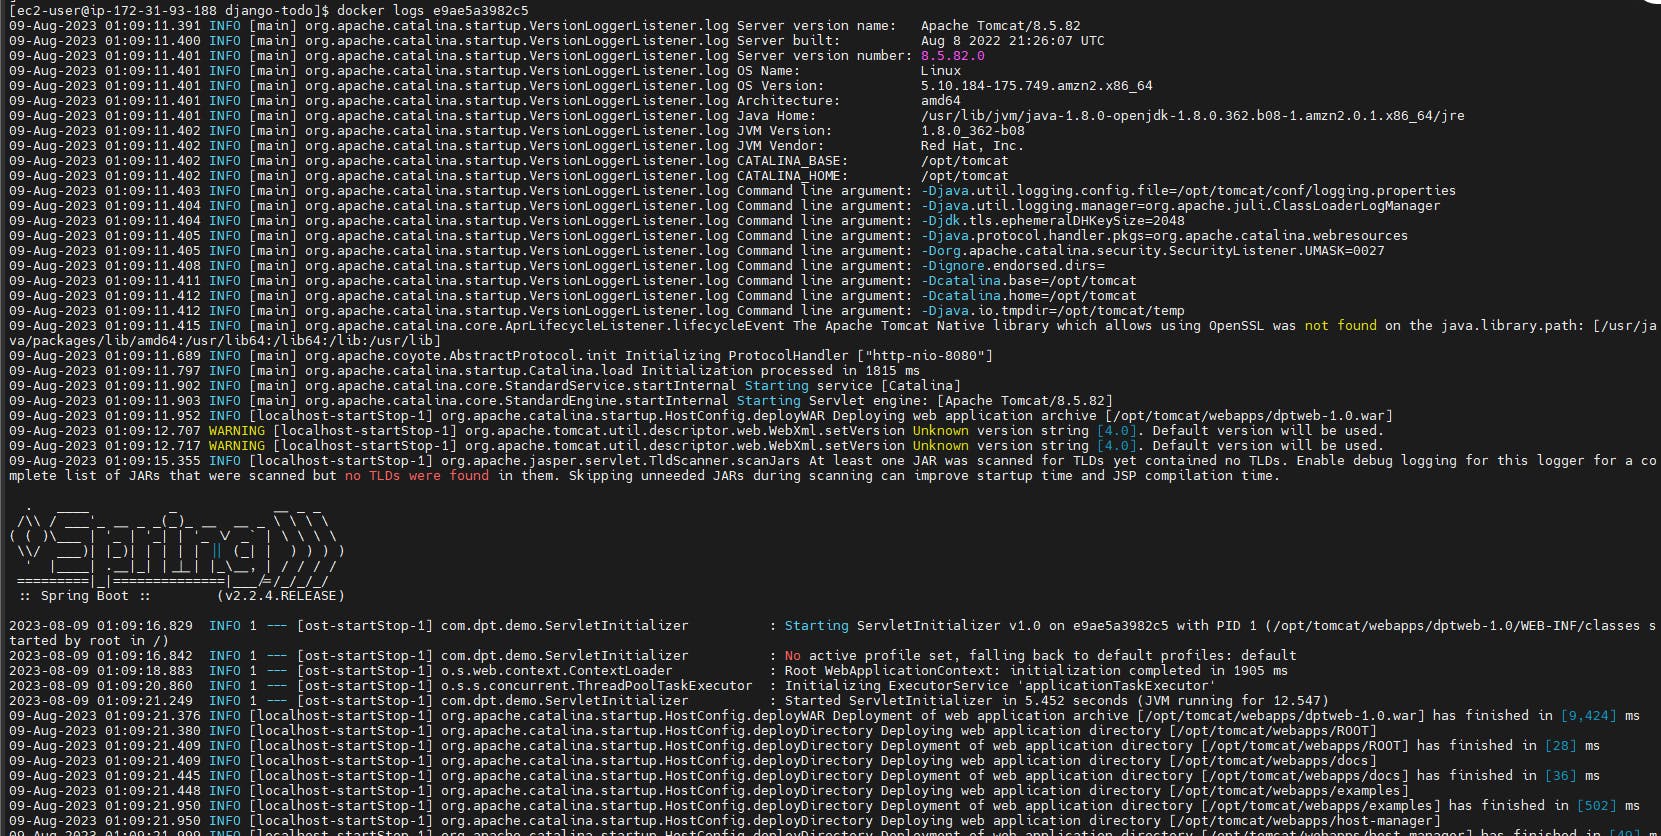
-Use the docker logs command to view the container's log output.
-Use the docker stop and docker start commands to stop and start the container.

-Use the docker rm command to remove the container when you're done.

How to run Docker commands without sudo?
Make sure docker is installed and system is updated (This is already been completed as a part of previous tasks):
sudo usermod -a -G docker $USER
Reboot the machine.
Thank you for reading. Happy Learning 😊